Friday, December 23, 2011

3 Ways To Increase Your Visitor

Hai guys, ok in this time i will share some tips to you, tips how to increase your visitor. Not a traffic exchange, and not a SPAM. Not a blacklisted ways but we will do it with a White Hat SEO ways, not a simple way but not a difficult way too. The way that can increase your visitor, not a BOT visitor but a real human that maybe will interest if they looking your ads. The loyal visitor too your blog. The loyal visitor that will subscribe your blog, the loyal visitor that will visit your blog every time you updated it. The loyal visitor that will support you everytime. So what is the way? Ok lets we started it
3 Ways To Increase Your Visitor
1. Unique Content, every blog must have an Unique Content. If your blog filled by 90% Unique and Original content. I guess that your blog has unique visitor/day up to 1000 visitor/day. Content is the king, if your blog have a good design, template and good navigation. And you've promote your blog to any website but all of your content are Copy-Paste from other website! I think many people wouldnt visit your blog, because they has read a same article on other website.
So remember you must have an Unique Content on your Blog.
2. Promote It, if your blog have a good and unique content, and original content, good navigation, good User Interface design but you doesnt promote it. Promote to any website, blog walking? Adding your site to search engine? Adding your site to social bookmark? And others site? How you can get visitor? How others people can knew about your blog? Know about your blog content? And remember, if you promote it by commenting on others blog. Dont do SPAM
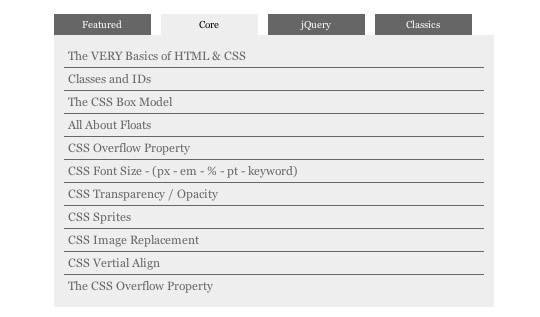
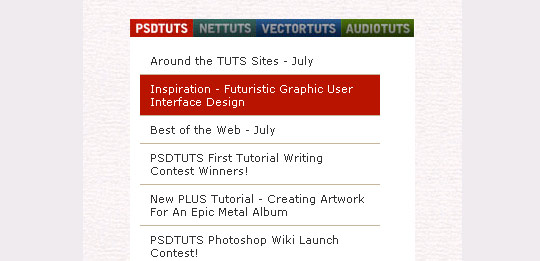
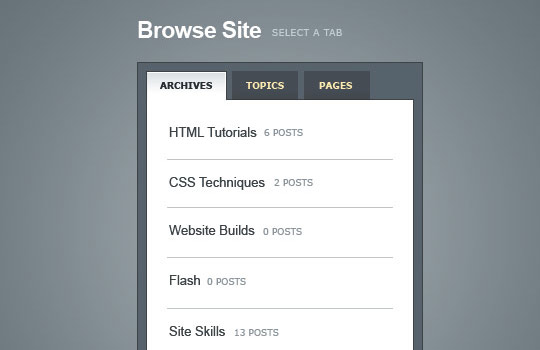
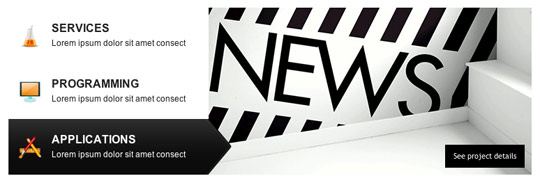
So you must promote your blog.
3. User Interface Design, and the last tips from me is your blog must have an Interactive Blog Design. Not how search engine looking your website, but how others people looking your site. If some people are interest with your blog design, maybe she/he will subscribe your blog, will follow your blog. Why? Because she/he is interested to your blog, and she/he want to learn how to create a Wonderful Blog Like this? And people wil enjoyable while they read an article on your blog. So it will decrease your bounce visitor.
Lets Spice Up Your Blog Design
For the last step, you can follow my blog or subscribe it. I will share awesome web design tutorial everytime. So lets subsrcibe my blog, by filling a form below every post.
Ok now, you've read my short article. And now you must try that. I hope it working for you
3 Ways To Increase Your Visitor
lets see next post, How to increase your page rank "Dofollow blog list 2012"
Read More 3 Ways To Increase Your Visitor
Wednesday, December 21, 2011

How To Create SEO Friendly Sitemap For Blogger

Today i will share a tutorial to increase your Page Rank and SERP. How to do that? You must create a sitemap, its very easy when you use Wordpress for your site. But if you use blogger, maybe it not easy as Wordpress.
So now, i will give you a tutorial how to create SEO friendly Sitemap For Blogger.

1. Login to blogger
2. Posting - Create a New Page
3. Click edit HTML page and give "Sitemap" as the page title
4. Just paste this code
<script src="http://yourjavascript.com/18113981113/bukarahasiablog-toc.js">
</script>
<script src="http://yahyagan.blogspot.com/feeds/posts/default?max-results=9999&amp;alt=json-in-script&amp;callback=loadtoc">
</script>
5. Change http://yahyagan.blogspot.com with your own url.
6. Publish your page and dont forget to ping it
Ok thats it, very simple? But it can increase your page rank and SERP.
Thanks for visit my blog guys. How To Create SEO Friendly Sitemap For Blogger
Like this article? Lets subscribe my blog below, many great blogging tips in this blog. Like this post "How To Create a Simple and beautiful  Subscription Box"
Read More How To Create SEO Friendly Sitemap For Blogger
Tuesday, December 20, 2011

Let's Create Very Beautiful And Simple Subscription Box

Hai guys, now i will give you a tutorial how to create a Very Beautiful Subscription Box below your post. Feedburner is a great google stuff, that stuff can make you share some article on your blog to feedburner automatically, like podcast. It can increase your visitor too, and now i will give you a tutorial how to Create a very Beautiful And Simple Subscription Blog Below Your Post.

1. Login to blogger
2. Go to design - edit HTML - Expand Widget Template
3. Find </b:skin> code and paste this code below before </b:skin> code
/*stay connected*/
.stay-connected {
-moz-border-radius-bottomleft:5px;
-moz-border-radius-bottomright:5px;
-moz-border-radius-topleft:5px;
-moz-border-radius-topright:5px;
background: #ffffff;
margin: 3px 0 3px 0;
padding: 5px;
border: 1px solid #E6E6E6;
overflow: auto;
}
#stay-icons {
float: left;
margin: 0 5px 0 0;
padding: 2px;
}
/*end stay connected*/
.yahya-email{
background:url(http://cdn2.iconfinder.com/data/icons/functionsocial/Social_Email_RSS.png) no-repeat 0px 12px ;
width:250px;
padding:10px 0 0 55px;
float:left;
font-size:1.4em;
font-weight:bold;
margin:0 0 10px 0;
color:#686B6C;
}
.yahya-emailsubmit{
background:#9B9895;
cursor:pointer;
color:#fff;
border:none;
padding:3px;
margin:0px 0px 0px 5px;
text-shadow:0 -1px 1px rgba(0,0,0,0.25);
-moz-border-radius:3px;
-webkit-border-radius:3px;
border-radius:3px;
font:12px sans-serif;
}
.yahya-emailsubmit:hover{
background:#81acc7;
}
4. Now lets find <p><data:post.body/></p> and paste this code after <p><data:post.body/></p>
<div class='yahya-email' style='margin-left:20px;'>
Subscribe via Email
<form action='http://feedburner.google.com/fb/a/mailverify' method='post' onsubmit='window.open(&apos;http://feedburner.google.com/fb/a/mailverify?uri=BlogYahyagan&apos;, &apos;popupwindow&apos;, &apos;scrollbars=yes,width=550,height=520&apos;);return true' target='popupwindow'>
<input class='textarea' gtbfieldid='3' name='email' onblur='if(this.value==&apos;&apos;)this.value=this.defaultValue;' onfocus='if(this.value==this.defaultValue)this.value=&apos;&apos;;' type='text' value='Enter Your Email'/><input name='uri' type='hidden' value='BlogYahyagan'/><input name='loc' type='hidden' value='en_US'/><input class='yahya-emailsubmit' type='submit' value='Subscribe'/>
</br><a href="http://blogyahyagan.blogspot.com">Want this widget on your blog? Click Here</a>
</form>
</div></td></tr></tbody></table></div>
</b:if>
5. And last step is change the text that colored blue with your feed burner url.
6. Save your template.
7. And you can see how your Subscription box look like
Lets Create Very Beautiful And Simple Subscription Box
Inspired by : http://www.spiceupyourblog.com
Lets see this awesome blogging tips Replace Post A Comment Text With A Cool Image On Blogger
Read More Let's Create Very Beautiful And Simple Subscription Box

How To Create Rounded Corner On Blogger Widget

Maybe until now my blogger visitor are just 5/day but i'll always update my blog content. And now i will share to you a tutorial "How To Create Rounded Corner On Blogger Widget", i create this article by my self, its pure by me. But maybe some people has known this tutorial before and create an article like this on them site/blog. So do you want to Create Rounded Corner On Blogger Widget? If you look my subscription box below every post or related post box, maybe you'll see that the corner is rounded. Maybe on your subscription box are rounded too, but maybe some people arent have a rounded corner on them subscription box. So i will give you a tutorial "How To Create Rounded Corner On Blogger Widget"

1. Login to blogger
2. Go to design - Edit HTML - Expand widget template
3. For an example, lets look this css code or read this "How To Create Related Box Below Your Post"
On that tutorial we'll see a css code like this :
.rbbox{border: 1px solid #E6E6E6;padding: 5px;
background-color: #F3F8FF;-moz-border-radius:5px; margin:5px;}
.rbbox:hover{background-color: #ffffff;}
4.And on that css you'll see a code like this

.rbbox{border: 1px solid #E6E6E6;padding: 5px;
background-color: #F3F8FF;-moz-border-radius:5px; margin:5px;}
.rbbox:hover{background-color: #ffffff;}
Or
-moz-border-radius:5px;
Yeah the code (css) that colored red. That css code that make your Related Box Widget corner are rounded. And now you can add that css code for every blog widget on your blog.
Example : Read the tutorial "How To Create Beautiul Slider - Nivo Slider"
and you will see a css code like this
/* The Nivo Slider styles */
#slider{
width:618px;
height:246px;
}
So now, how to create a rounded corner on that Nivo Slider?
Just paste the code
/* The Nivo Slider styles */
#slider{
-moz-border-radius:5px;
width:618px;
height:246px;
}
And now you'll look the corner of that slider are rounded.
How to make different rounded pixel for every direction.
/* The Nivo Slider styles */
#slider{
-moz-border-radius-bottomleft:5px;
-moz-border-radius-bottomright:5px;
-moz-border-radius-topleft:5px;
-moz-border-radius-topright:5px;

width:618px;
height:246px;
}
And now lets change the code value that colored green.
/* The Nivo Slider styles */
#slider{
-moz-border-radius-bottomleft:15px;
-moz-border-radius-bottomright:5px;
-moz-border-radius-topleft:15px;
-moz-border-radius-topright:5px;

width:618px;
height:246px;
}
This is the result of that code.
Ok thats it. I hope this information is very helpful. Thank you for visiting this blog.
How To Create Rounded Corner On Blogger Widget
Waw i will share too you a tips how to get .EDU Backlink for free, lets see them
How To Get .EDU Backlink For Free
Read More How To Create Rounded Corner On Blogger Widget
Monday, December 19, 2011

How To Create Beautiful Related Post Box Below Your Post

Hai guys do you know how to create beautiful related post box below your post? i'll give you a tutorial how to create beautiful related post box below your post. But remember maybe this related box isnt beautiful, its very simple. I just write the Title like this "How To Create Beautiful Related Post Box Below Your Post" because maybe it can increase my visitor, cause they are interested how to create a beautiful related post box below your post LOL. Thats the part of SEO.

1. Login to blogger
2. Layout/Design - Edit HTML - Expand Widget Template
3. Find this code
</b:skin>
4. And then paste this code below before </b:skin> code
.rbbox{border: 1px solid rgb(192, 192, 192);padding: 5px;
background-color: #F3F8FF;-moz-border-radius:5px; margin:5px;}
.rbbox:hover{background-color: #ffffff;}
5. After that lets find this code
<data:post.body/>
<b:if cond='data:blog.pageType == &quot;item&quot;'>
6. And then paste this code after the code on step 5
<br/>
<a href="http://blogyahyagan.blogspot.com"><h2>You Might Also Like :</h2></a>
<div class='rbbox'>
<div style='margin:0; padding:10px;height:200px;overflow:auto;border:0px solid #ccc'>
<div id='albri'/>
<script type='text/javascript'>
var homeUrl3 = &quot;<data:blog.homepageUrl/>&quot;;
var maxNumberOfPostsPerLabel = 4;
var maxNumberOfLabels = 10;
maxNumberOfPostsPerLabel = 10;
maxNumberOfLabels = 3;
function listEntries10(json) {
var ul = document.createElement(&#39;ul&#39;);
var maxPosts = (json.feed.entry.length &lt;= maxNumberOfPostsPerLabel) ?
json.feed.entry.length : maxNumberOfPostsPerLabel;
for (var i = 0; i &lt; maxPosts; i++) {
var entry = json.feed.entry[i];
var alturl;
for (var k = 0; k &lt; entry.link.length; k++) {
if (entry.link[k].rel == &#39;alternate&#39;) {
alturl = entry.link[k].href;
break;
}
}
var li = document.createElement(&#39;li&#39;);
var a = document.createElement(&#39;a&#39;);
a.href = alturl;
if(a.href!=location.href) {
var txt = document.createTextNode(entry.title.$t);
a.appendChild(txt);
li.appendChild(a);
ul.appendChild(li);
}
}
for (var l = 0; l &lt; json.feed.link.length; l++) {
if (json.feed.link[l].rel == &#39;alternate&#39;) {
var raw = json.feed.link[l].href;
var label = raw.substr(homeUrl3.length+13);
var k;
for (k=0; k&lt;20; k++) label = label.replace(&quot;%20&quot;, &quot; &quot;);
var txt = document.createTextNode(label);
var h = document.createElement(&#39;b&#39;);
h.appendChild(txt);
var div1 = document.createElement(&#39;div&#39;);
div1.appendChild(h);
div1.appendChild(ul);
document.getElementById(&#39;albri&#39;).appendChild(div1);
}
}
}
function search10(query, label) {
var script = document.createElement(&#39;script&#39;);
script.setAttribute(&#39;src&#39;, query + &#39;feeds/posts/default/-/&#39;
+ label +
&#39;?alt=json-in-script&amp;callback=listEntries10&#39;);
script.setAttribute(&#39;type&#39;, &#39;text/javascript&#39;);
document.documentElement.firstChild.appendChild(script);
}
var labelArray = new Array();
var numLabel = 0;
<b:loop values='data:posts' var='post'>
<b:loop values='data:post.labels' var='label'>
textLabel = &quot;<data:label.name/>&quot;;
var test = 0;
for (var i = 0; i &lt; labelArray.length; i++)
if (labelArray[i] == textLabel) test = 1;
if (test == 0) {
labelArray.push(textLabel);
var maxLabels = (labelArray.length &lt;= maxNumberOfLabels) ?
labelArray.length : maxNumberOfLabels;
if (numLabel &lt; maxLabels) {
search10(homeUrl3, textLabel);
numLabel++;
}
}
</b:loop>
</b:loop>
</script>
</div>
<script type='text/javascript'>RelPost();</script>
</div>
</b:if>
<b:else/>
7. Save your template

Ok thanks for visit my blog. If you've some problem in this tutorial "How to create Beautiful Related Post Box Below Your Post"
Lets see this awesome web design tutorial How To Create A Rounded Corner On Blogger Widget
Read More How To Create Beautiful Related Post Box Below Your Post

How To Get .EDU Backlink For Free

Edu Backlink or backlink from Edu sites is very high quality backlink. Because .edu sites is an education sites and get High Authority from google. So if you can get some backlink from .edu sites its possible to increase your position on SERP, Increase your page rank, Increase Alexa and Increase your Visitor too.
Many sites give a simple way How To Get .EDU Backlink For Free, but you must pay for it, and its very expensive. You must pay US$10 just for 1 backlink from . Edu Site
And now i will give a tutorial to you, How To Get .EDU Backlink For Free

So this is it step by step How To Get .EDU Backlink For Free
1. Type this footprint on google search engine (Choose one of them, or you can try it one by one)
site:.edu + moodle inurl:/signup.php
site:.edu.tw + moodle inurl:/signup.php
site:.nl + moodle inurl:/signup.php
site:.go.id + forum inurl:/register
You can add a country code after domain, example :
site:.edu.id + moodle inurl:/signup.php
So google will shown you some .edu site from ID country or Indonesia
2. Now google will shown you some edu site, and you can try that one by one.
3. Just register and go to profile tab
4. Fill the "My Website" tab
5. Fill it by your own URL
6. Save it
7. Copy the URL of your own profile
8. Ping it!
9. And now you'll get .EDU Backlink For Free

Simple? Yes maybe its simple, but because i can give an image step by step so its looking easy. But its hard to try. Many .EDU site will rejected a registration e-mail from google, yahoo, hotmail etc. But just try it guys, some .EDU site will accept registration for anonymous member.
Next post is How to Create Beautiful Related Post Box Below Posting
Read More How To Get .EDU Backlink For Free
Friday, December 16, 2011

How To Highlight Author Comment On Blogger

Hai guys, do you have a blog? Yes, i think yes. And maybe you want to make your comment (Author) different from anonymous or guest. Yes, if you want to Hightlight The Author Comment i will give you a tutorial. Hightlight the author comment is the simple way to make your visitor knew, who is the blog author.

How To Hightlight Author Comment : 
1. Login to blogger
2. Design - Edit HTML - Expand Widget Template
Wait, where is the tutorial How To Hightlight Author Comment
Ok here is How To Hightlight Author Comment On Blogger
3. Find this code
<dd class=’comment-body’>
4. After that paste the code that colored red. Like this :

<b:if cond=’data:comment.author == data:post.author’>
<dd class=’owner-Body’>
<p><data:comment.body/></p>
</dd>
<b:else/>

          <dd class=’comment-body’>
            <b:if cond=’data:comment.isDeleted’>
              <span class=’deleted-comment’><data:comment.body/></span>
            <b:else/>
              <p><data:comment.body/></p>
            </b:if>
          </dd>

</b:if>
Ok you almost done "How To Highlight Author Comment On Blogger"
5. Now find this code
comments-block .comment-body p {
margin:0 0 .75em;
background:#f3f3f3 no-repeat left bottom;
}
6. Ok now lets paste this code After 

comments-block .comment-body p {
margin:0 0 .75em;
background:#f3f3f3 no-repeat left bottom;
}
.owner-Body {
margin:0;
padding:0 0 0 20px;
}
.owner-Body p {
font-size:100%;
margin:0 0 .2em 0;
color:#FF0000;
text-decoration:bold;
}
7. Finally, save your template. And you'll see the result.

That's it "How To Hightlight Author Comment On Blogger"
Lets see this article "Breadcrumbs Navigation The Simple Way To Increase Your SERP"
Source : http://www.o-om.com/2008/03/tampilan-beda-untuk-komentar-pemilik.html
Read More How To Highlight Author Comment On Blogger
Wednesday, December 14, 2011

Let's Create Beautiful 3 Column Footer

Hai guys, maybe you think that you haven't enough space to place some gadget on your sidebar but your blog hasn't footer on that template or your footer just have 1 column. So now i will give you a tutorial "How To Create Beautiful 3 Column Footer"

1. Login to blogger
2. Go to layout - Edit Html - Expand Widget Template
3. Now find </b:skin> code and paste this code below BEFORE </b:skin> code

/* -----   LOWER SECTION   ----- */
#lower {
       margin:auto;
       padding: 0px 0px 10px 0px;
       width: 100%;
       background:#333434; } 
#lower-wrapper {
       margin:auto;
       padding: 20px 0px 20px 0px;
       width: 960px;
}
#lowerbar-wrapper {
     border:1px solid #DEDEDE;
      
background:#fff;        float: left;
       margin: 0px 5px auto;
       padding-bottom: 20px;
       width: 32%;        text-align: justify;
       font-size:100%;
       line-height: 1.6em;
       word-wrap: break-word; 
       overflow: hidden;
}
       .lowerbar {margin: 0; padding: 0;}
       .lowerbar .widget {margin: 0; padding: 10px 20px 0px 20px;}
.lowerbar h2 {
      margin: 0px 0px 10px 0px;
       padding: 3px 0px 3px 0px;
       text-align: left;
       color:#0084ce;         text-transform:uppercase;
      font: bold 14px Arial, Tahoma, Verdana;        border-bottom:3px solid #0084ce; }
.lowerbar ul {
      margin: 0px 0px 0px 0px;
      padding: 0px 0px 0px 0px;
      list-style-type: none;
}
.lowerbar li {
      margin: 0px 0px 2px 0px;
      padding: 0px 0px 1px 0px;
      border-bottom: 1px dotted #ccc;
}
4. Now find <!-- /main-wrapper --> or </body>
and just above this code paste the code below
<div id='lower'>
<div id='lower-wrapper'>
<div id='lowerbar-wrapper'>
<b:section class='lowerbar' id='lowerbar1' preferred='yes'>
</b:section>
</div>
<div id='lowerbar-wrapper'>
<b:section class='lowerbar' id='lowerbar2' preferred='yes'>
</b:section>
</div>
<div id='lowerbar-wrapper'>
<b:section class='lowerbar' id='lowerbar3' preferred='yes'>
</b:section>
</div>
<div style='clear: both;'/>
</div> </div>
5. Last step, save your template.

Customize The Footer
You can easily customize the look and colours of the this footer widget. I have bolded the important parts in the CSS code above. Read the descriptions below carefully to better stylize your three column widget. For changing colours use our HTML Color Generator
  • background:#333434;   Changing the six digit colour code will change the background colour of this widget.
  • width: 960px;  This is the width of the widget. If you want you can adjust this width value in accordance with the width of your blog.
  • background:#fff;  and    width: 32%; is the background colour and width of the three columns where the widgets are added.
  • color:#0084ce; This is the Colour of Title Headings
  • font: bold 14px Arial, Tahoma, Verdana;  Edit this to change the font size and family.
  • border-bottom:3px solid #0084ce;   Edit this to change the thickness, style and colour of the border that appears at the bottom of Title Heading
  • border-bottom: 1px dotted #ccc; Editing this will change the size, style and colour of the border that appears below links.  
So that's all, the tutorial "How To Create Beautiful 3 Column Footer
Lets see How To Hightlight Author Comment On Blogger
Source : http://www.mybloggertricks.com/2010/01/add-customized-three-column-footer.html
Read More Let's Create Beautiful 3 Column Footer
Tuesday, December 13, 2011

Breadcrumbs Navigation The Simple Way To Increase Your SERP

Do you know breadcrumbs?
Breadcrumbs typically appear horizontally across the top of a web page, usually below title bars or headers. They provide links back to each previous page the user navigated through to get to the current page or—in hierarchical site structures—the parent pages of the current one. Breadcrumbs provide a trail for the user to follow back to the starting or entry point. A greater-than sign (>) often serves as hierarchy separator, although designers may use other glyphs (such as » or ›), as well as various graphical treatments.
Typical breadcrumbs look like this:
Home page > Section page > Subsection page
or
Home page : Section page : Subsection page
And many people has create a breadcrumbs navigation for them blog, and itsvery effective to increase your SERP. So many visitor can come to your blog. And now i will give you a tutorial how to create a breadcrumbs on your blog.

1. Login to blogger
2. Layout - Edit HTML - Expand Widget Template
3. Find this HTML code
<b:if cond='data:post.title'>
4. After that paste this HTML code, after that code
<!-- Navigasi Breadcrumb Start -->
<b:if cond='data:blog.pageType == "item"'>
<a href='http://yoursitename.com/'>Home</a> &#187;
<b:if cond='data:post.labels'>
<b:loop values='data:post.labels' var='label'>
<a expr:href='data:label.url' rel='tag'><data:label.name/></a>
<b:if cond='data:label.isLast != "true"'>,</b:if>
</b:loop>
&#187;
</b:if>
<data:post.title/>
</b:if>
<!-- Navigasi Breadcrumb Stop -->
6. Change the "yourblogname.comm" with your blog name/url
7. Finally, save your template.
8. And you can see the breadcrumbs navigation on the top of your Article title

Lets see How To Create Beautiful 3 Column Footer
Source :
http://belajarbisnisonlines.blogspot.com/2010/11/cara-membuat-navigasi-breadcrumb-di.html
http://en.wikipedia.org/wiki/Breadcrumb_%28navigation%29
37A8GKRJWPTX
Read More Breadcrumbs Navigation The Simple Way To Increase Your SERP
Friday, December 9, 2011

Increase Your Revenue From Google Adsense

Hai guys, before this i've shared to you the "Most Clicked Adsense Place" and now i will share more adsense tricks. Now we will modify the ads below the title post, and maybe it will make your visitor will click them.
And it will look like this :
Ok now lets follow this tips :

1. Login to blogger
2. Layout > Edit HTML > Expand Widget Template
3. Now find </b:skin> code, and paste this code below BEFORE </b:skin> code
#iklan250{
 float:left;
 width:280px;
 text-align:center;
 background:transparent url(http://lh6.ggpht.com/_xcD4JK_dIjU/Sm8jz8qTKsI/AAAAAAAADHU/6te_TkpwmMw/d/ads250x250.png) center center no-repeat;
 padding:5px 10px 10px 5px;
}
4. And now search this code
<div class='post-body entry-content' expr:id='&quot;post-body-&quot; + data:post.id'>
Info : 
Maybe you'll see 2 code like that, you must choose the first code.
5. Then add this HTML before that code
<div id='iklan250'>
Paste Your Ads Here [After Parse your ads]
</div>
And Then paste your ads between that code. Or replace the red text marked with your ads code.
IMPORTANT :
The ads size must be 250x250. But before you paste that you must parse the ads code first. Click here to parse HTML code

Ok that's it, now your adsense revenue will be increased. Thanks for visit this blog.
Read More Increase Your Revenue From Google Adsense

Show Adsense Ads Below Post Title

In this tutorial I will explain how to place Adsense ads below post title in Blogger Blogs with lots of customization tips. You might have noticed that most of the bloggers show Google adsense ads below title to increase their Click through rate and earnings.
According to Google adsense help pages ” Where to place adsense ads ?“. Placing adsense ads below title and above article content can bring high ctr and performance.

This “heat map” illustrates the ideal placing on a sample page layout. The colors fade from dark orange (strongest performance) to light yellow (weakest performance). So it’s clear from the heat map that the adsense ads below post title can bring high ctr.
How To Add Adsense Below Post Title

It’s really very easy to add adsense ads below post title in blogger. Inorder to add adsense ads below post title ,just follow the below steps.
Before adding the adsense ads to blogger templates , we need to encode our adsense ads code.If you add the adsense code without encoding then you can’t see any adsense ads below post title
Encoding Adsense Ad Code

To encode adsense ads, first create an adsense ad and then visit centricle website to encode. In centricle web page , you need to paste your adsense code in the text area and then click ” Encode “. Copy the encoded code. Now your adsense code is ready to be added to blogger template.
Showing Adsense In The Post Page

In order to implement this hack in your blogger template. you need to change the encoded adsense ad code to this.
<b:if cond='data:blog.pageType == &quot;item&quot;'>Encoded Adsense code here</b:if>  
Now paste this code above <p><data:post.body/></p>
Ok thats it now you can showing your adsense code into your Post page, and it will increase your revenue. I promise
Thanks to : http://www.smashingtips.com
Source : http://www.smashingtips.com/show-adsense-ads-below-post-title-in-blogger
Read More Show Adsense Ads Below Post Title

Most Clicked Adsense Place

Hai guys, do you have an adsense account? And maybe you want to know how to increase your earning on google adsense? Do you know where is the place that will increase your earning? Lets follow me, i will tell you where.

1. Everybody always read a post or article from left to right, so your template must have a big left sidebar like my template. So everybody can see your ads while they read your article. And maybe they will interest with your ads and click the ads. So put your 250x250 ads on your left sidebar. And add skyscraper 120x600 or wide skycraper 160x600.

2. And every body always read your post, so lets put adsense below your title. Dont know how to put adsense below your title? Click here

3. Last tips from me is change your adsense type on your sidebar to an image and a text ads on your post.
Thanks, i hope it will increase your earnings, i've tried that on my blog. And that's work.
Read More Most Clicked Adsense Place

Add A Full Lenght Gadget Below Your Blog Header

Hai guys, in this third post i will share a simple tutorial to you but it was very helpful and useful. Maybe some of you want to put a gadget on you header, like a slider (Read : Create Beautiful jQuery Slider-Nivo Slider) or adsense. But your template can't do that, you can't place any gadget on your header? So this is the tutorial, how to add a full lenght gadget below your blog header
Cross Column Gadgets

Gadgets Not Allowed - This area is called the Cross Column and the screenshot below shows there is no option to place gadgets in the cross column :
Gadgets Allowed - Once we change the code you will have a brand new 'add a gadget' area :
 Placing Gadget In The Crosscolum

1. Login to Blogger
2. Go to the Layout section
3. Click the Edit HTML tab
4. Tick the 'Expand Widget Templates' box
5. Find this following code (Click Ctrl+F to show the search box on your browser)

<b:section class='crosscol' id='crosscol' showaddelement='no'/>
6. Change Showaddelement='no' to Showaddelement='yes' as shown below :
<b:section class='crosscol' id='crosscol' showaddelement='yes'/>
7. Save your template

Now you'll be able to put a gadget below your header, and now you can put your Beautiful Nivo Slider on the header.
Source :
http://www.spiceupyourblog.com/2010/02/adsense-leaderboard-header-blogger.html
Read More Add A Full Lenght Gadget Below Your Blog Header

5 Great jQuery Tab Navigation Tutorial

Hallo guys, this is the second blog of Yahya Ayyash. Hmmm for the first post i will share to you 5 Great jQuery Tab Navigation Tutorial. jQuery Tab Navigation is very useful, because if you use jQuery Tab Navigation that will increase a free space on your sidebar and make your blogger more beautiful.
So this is it, 5 jQuery Tab Navigation Tutorial :

Create A Tabbed User-Interface Using jQuery
A great tutorial and plugin for creating an animated tabbed area. Its make your blog is comfortable.

Dynamic Fun With SimplyPie And jQuery
This tutorials teaches you how to build a dynamic tabbed blogroll with some fun jQuery animations.

Slick Tabbed Content Using CSS And jQuery
This tutorials teaches you how to build a simple little tabbed information box in HTML, then make it function using some simple Javascript, and then finally we’ll achieve the same thing using the jQuery library.

Featured List
This jQuery plugin enables simple and easy creation of an interactive “Featured Items” widget.

Fancy Image With Form Using jQuery
This tutorial teaches you how to create a fancy sliding form that shows some validation feedback to the user after each step. This form saves a lot of space and is easy to access – it basically works like a slide show, just that we have fieldsets of a form instead of images.
So this is it!! What are you thinking? Greatful allright? Yeahh hmmm dont know how add a full length gadget below your header? Click Here
Read More 5 Great jQuery Tab Navigation Tutorial

Create Beautiful jQuery Slider - Nivo Slider

Hai guys i will share a great stuff for you. Do you like slider on my homepage? If you like that very much, now you'll got them on your web homepage!!! Yes that's allright i will share a tutorial how to create beautiul jQuery slider with Nivo Slider deafult themes.
So This Is It

Nivo Slider Screenshot
1. Login to blogger
2. Go to layout page
3. And then click "Edit HTML"
4. Find </b:skin> code
Tips!!!
You can use Ctrl+F to find some text on your browser
5. Copy this HTML code and paste it before </b:skin> code
/*
 * jQuery Nivo Slider v2.7
 * http://nivo.dev7studios.com
 *
 * Copyright 2011, Gilbert Pellegrom
 * Free to use and abuse under the MIT license.
 * http://www.opensource.org/licenses/mit-license.php
 *
 * March 2010
 */


/* The Nivo Slider styles */
#slider{
width:618px;
height:246px;
}
.nivoSlider {
    position:relative;
}
.nivoSlider img {
    position:absolute;
    top:0px;
    left:0px;
}
/* If an image is wrapped in a link */
.nivoSlider a.nivo-imageLink {
    position:absolute;
    top:0px;
    left:0px;
    width:100%;
    height:100%;
    border:0;
    padding:0;
    margin:0;
    z-index:6;
    display:none;
}
/* The slices and boxes in the Slider */
.nivo-slice {
    display:block;
    position:absolute;
    z-index:5;
    height:100%;
}
.nivo-box {
    display:block;
    position:absolute;
    z-index:5;
}
/* Caption styles */
.nivo-caption {
    position:absolute;
    left:0px;
    bottom:0px;
    background:#000;
    color:#fff;
    opacity:0.8; /* Overridden by captionOpacity setting */
    width:100%;
    z-index:8;
}
.nivo-caption p {
    padding:5px;
    margin:0;
}
.nivo-caption a {
    display:inline !important;
}
.nivo-html-caption {
    display:none;
}
/* Direction nav styles (e.g. Next & Prev) */
.nivo-directionNav a {
    position:absolute;
    top:45%;
    z-index:9;
    cursor:pointer;
}
.nivo-prevNav {
    left:0px;
}
.nivo-nextNav {
    right:0px;
}
/* Control nav styles (e.g. 1,2,3...) */
.nivo-controlNav a {
    position:relative;
    z-index:9;
    cursor:pointer;
}
.nivo-controlNav a.active {
    font-weight:bold;
}
/*
Skin Name: Nivo Slider Default Theme
Skin URI: http://nivo.dev7studios.com
Skin Type: flexible
Description: The default skin for the Nivo Slider.
Version: 1.0
Author: Gilbert Pellegrom
Author URI: http://dev7studios.com
*/

.theme-default .nivoSlider {
    position:relative;
    background:#fff url(http://i1212.photobucket.com/albums/cc451/ramseyinjury/loading.gif) no-repeat 50% 50%;
    margin-bottom:50px;
    -webkit-box-shadow: 0px 1px 5px 0px #4a4a4a;
    -moz-box-shadow: 0px 1px 5px 0px #4a4a4a;
    box-shadow: 0px 1px 5px 0px #4a4a4a;
}
.theme-default .nivoSlider img {
    position:absolute;
    top:0px;
    left:0px;
    display:none;
}
.theme-default .nivoSlider a {
    border:0;
    display:block;
}

.theme-default .nivo-controlNav {
    position:absolute;
    left:50%;
    bottom:-42px;
    margin-left:-40px; /* Tweak this to center bullets */
}
.theme-default .nivo-controlNav a {
    display:block;
    width:22px;
    height:22px;
    background:url(http://i1212.photobucket.com/albums/cc451/ramseyinjury/bullets-1.png) no-repeat;
    text-indent:-9999px;
    border:0;
    margin-right:3px;
    float:left;
}
.theme-default .nivo-controlNav a.active {
    background-position:0 -22px;
}

.theme-default .nivo-directionNav a {
    display:block;
    width:30px;
    height:30px;
    background:url(http://i1212.photobucket.com/albums/cc451/ramseyinjury/arrows-1.png) no-repeat;
    text-indent:-9999px;
    border:0;
}
.theme-default a.nivo-nextNav {
    background-position:-30px 0;
    right:15px;
}
.theme-default a.nivo-prevNav {
    left:15px;
}

.theme-default .nivo-caption {
    font-family: Helvetica, Arial, sans-serif;
}
.theme-default .nivo-caption a {
    color:#fff;
    border-bottom:1px dotted #fff;
}
.theme-default .nivo-caption a:hover {
    color:#fff;
}
6. Then find </head> code on your template
7. After that paste this code below BEFORE </head> code
<script src='https://ajax.googleapis.com/ajax/libs/jquery/1.5.1/jquery.min.js' type='text/javascript'/>
<script src='http://yourjavascript.com/8855314511/jquery.nivo.slider.pack.js' type='text/javascript'/>
<script type='text/javascript'>
$(window).load(function() {
$(&#39;#slider&#39;).nivoSlider();
});
</script>
<!--End Slider Scripts info @ http://blogyahyagan.blogspot.com-->
IMPORTANT :
If you've insert jQuery script to your blog before, you can remove the text that i colored "red".
8. And then save your template.
9. Go to "Edit Layout"
10. Click "Add Gadget"
IMPORTANT :
Read how to Add Full Width Cross Column Gadgets To Blogger.
11. New HTML/Javascript
12. And then paste this code
<div class="slider-wrapper theme-default">
<div class="ribbon"></div>

<div id="slider" class="nivoSlider">

<a href="http://yahyagan.blogspot.com/2011/11/16-best-free-blogger-templates.html"><img src="http://i1212.photobucket.com/albums/cc451/ramseyinjury/template.png" alt="" title="16 Amazing Template Featuring jQuery Slider" /></a>

<a href="http://yahyagan.blogspot.com/2011/11/angry-birds-season-2-full-crack.html"><img src="http://i1212.photobucket.com/albums/cc451/ramseyinjury/angrybirds.png" alt="" title="Angry Birds Season 2 Full Cracked"/></a>

<a href="http://yahyagan.blogspot.com/2011/11/kaspersky-activation-code-16-nov-2011.html"><img src="http://i1212.photobucket.com/albums/cc451/ramseyinjury/kaspersky.png" alt="" title="#htmlcaption" /></a>
</div>
<div id="htmlcaption" class="nivo-html-caption">
<strong>Kaspersky Antivirus Full Version With Activation Code
</strong></div>

</div>
13. Finally click save template
Note :
Change the blue color text with your article url
Change the red color text with your image url
Change the green color text with your own caption
Thanks for visit this blog, hope you will like this article. Click here to see 5 Great jQuery Tab Navigation Tutorial
For other information or other Nivo Slider Theme you can go to the Nivo Slider Theme Official Webpage
http://www.nivo.dev7studios.com/
Read More Create Beautiful jQuery Slider - Nivo Slider

Link Exchange

Hai guys, do you want to get backlink from me? Its easy just place my link on your blog, and i will place your link on my blog. Dont know how to place my link on your blog?
Simply, just Follow This Step :

1. Copy this html code to your blog, on home page or link exchange page. Up to you guys.
<a href="http://blogyahyagan.blogspot.com/">Web Design | SEO Tutorial | Blogging Tutorial | Adsense Tutorial</a>
2. And then save it or publish it.

Or you want to get Free Three Way Backlink from me?

What the meaning of three way backlink?
 3 Way Backlinks are the new reciprocal linking strategy.  It used to be that you’d give a link to another site and they’d link back to you and it would count as an incoming link.  Google decided some time ago that reciprocal links were to be discounted by their search engines.  People of course came up with a new linking strategy which they call 3 way linking.

The basic premise is that you link to my website a and I’ll link back to you with my website b which, in theory, negates the whole reciprocal effect of the links.  It also has the side benefit of keeping the link juice moving if I link site a and b together with a one way link.
Or it can be explained like this
A-B-C-A
Site A give link to site B - Site B Give link to Site C- And site C give a link to site A. Like the rolling wheel
And it will increase your SERP

So if you want to get Free 3 Way Backlink from me. Just comment on this blog, and i will give you tutorial step by step. Three Way Backlink is more valuable than One Way Backlink or Two way backlink.
So what are you waiting for?

My Friends :
Read More Link Exchange